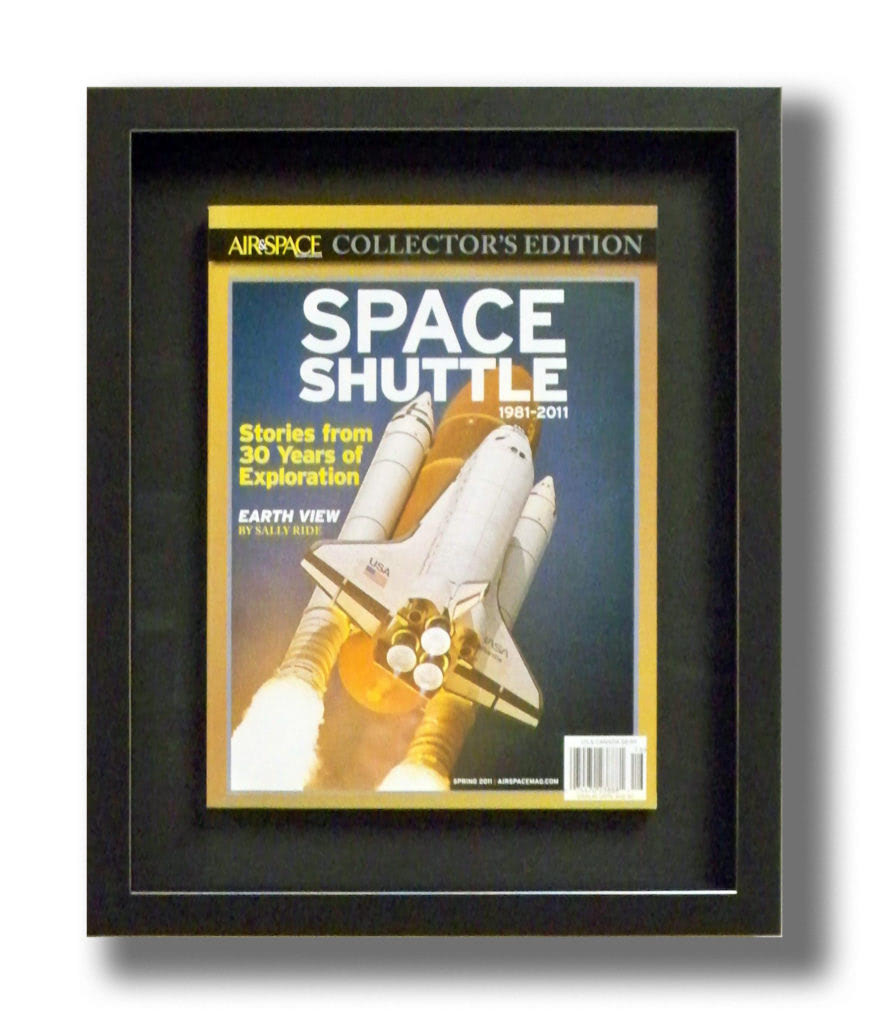
In a previous blog post we looked at how we can use Museum Glass® to create a three-dimensional “levitated” mount. We can use a similar method to create the same sort of magical look for other types of artwork with Optium Museum Acrylic®. In this example the artwork is a magazine, but it also works well with items such as:
- Comic books
- Documents
- Crocheted doilies
- Flags
- Papercuts
The mounting method works by applying even, gentle pressure to the artwork to hold it in place against the glazing. Depending on the design and the artwork, it may be simple mechanical pressure from the positioning of the artwork, or pressure can come from batting placed behind the artwork. This pressure works to hold the artwork in place, with no adhesives or stress, between the backing and the acrylic.
Of course we all know that artwork should never touch the glass, and that is still true. However, in this type of design we use acrylic, not glass. Acrylic has very different thermal properties as compared to glass, so there is very little chance that condensation will form on it. With a presentation like this, acrylic is mandatory.
The magazine is held to a slightly undersized backing with Mylar. Given the magazine’s weight and the slick paper it is printed on, it needs more support than can be given by the pressure mount alone. To start with, I cut a piece of Mylar slightly narrower than the width of the magazines and about 1½ times its height. I placed it under the front cover and folded the flaps at the top and bottom around to the back of the magazine. I then removed the Mylar and used a burnishing bone to crease the folds so that the Mylar would wrap tightly around to the back of the magazine and placed it back inside the front cover.
Next, I cut a piece of black foam board about 1/8” (3mm) smaller than the magazine and placed it on the back of the magazine, face down, and wrapped the Mylar flaps to the back of the board. The flaps are secured with a strong double-sided tape, burnished well. Then the mounted magazine is mounted to the background mat with dots of glue and tape to hold it in place while the glue dries. Keep in mind that the adhesives are not in contact with the magazine, just the foam board.

Every part of the magazine is now mounted, with only the front cover free. This is where magic happens, and it’s ridiculously easy. Instead of cutting the mat and foam board strips to line the sides of the frame to give 1/8” (3mm) or more clearance from the glazing, I cut them to be about 1/16” (1.5mm) smaller than the height of the mounted magazine. Once the frame is fit, the slight pressure holds the cover down and the magazine in place.

Optium Museum Acrylic is essential to the success of this design. Its thermal properties allow placing the artwork directly against it, and its antireflective coatings mean that there are virtually no reflections, especially important with an all-black design like this.
Give it a try with some samples for your store and you’ll be able to sell design that will really impress your customers with your framing magic. Your sales of Optium Museum Acrylic (and your profits) will increase!
Share this Article:
This article is intended for educational purposes only and does not replace independent professional judgment. Statements of fact and opinions expressed are those of the author(s) individually and, unless expressly stated to the contrary, are not the opinion or position of Tru Vue or its employees. Tru Vue does not endorse or approve, and assumes no responsibility for, the content, accuracy or completeness of the information presented.
