Sharing Our Glazing Expertise With You
More information on products, applications, care and handling, and FAQs available here.
- Samples
- Literature
- FAQs
- Samples
Complimentary Samples
Tru Vue provides fabrication samples and literature, at no charge, to printers and face mounters to test with their process. Please allow 10-14 business days for order processing.
- Literature
Complimentary Literature
Literature can be downloaded for your reference.

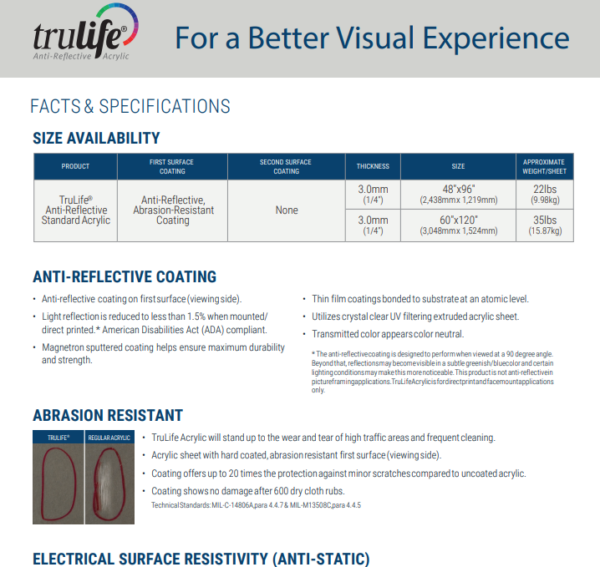
TruLife Fact & Specification Sheet

TruLife, The Best Way to Display Your Images Flyer
- FAQs
UV Protection
No. There is a distinct difference between UV filtering glazing and glazing that provides UV protection. According to PPFA Guidelines for Framing Works of Art on Paper, for glazing to be labeled as providing UV protection, it must block at least 97% of the UV rays in the 300 to 380 nanometer range.
Tru Vue Conservation Grade glass and acrylic products offer this level of protection. In providing at least 97% UV protection, Tru Vue Conservation Grade products are considered “photo-safe” by meeting ISO 18902 and passing ISO 18916.
Tru Vue® Conservation Grade acrylic products, including Conservation Clear® Acrylic and Conservation Reflection Control® Acrylic and Optium Museum Acrylic® effectively blocks up to 99% of all harmful indoor and outdoor UV light rays with its UV filtering technology.
Yes. Tru Vue manufactures its Conservation Grade glass products by applying an inorganic silica-based UV inhibiting coating to the glass surface. The UV coating is “baked” into the glass, producing a permanently bonded coating. Tru Vue Conservation Grade glass products have been field tested for over 20 years and do not delaminate or degrade over time.
Specific to acrylic products, Tru Vue does not apply a UV coating to its Conservation Grade acrylic products. The UV protection is provided within the acrylic substrate and is permanent.
Since UV light rays come from indoor and outdoor light sources, all items on display are vulnerable to the damaging effects of UV light exposure. That’s why it is important to use glazing with at least 97% UV protection on all of your custom framing projects.
Conservation framing materials and techniques should always be used on sentimental, valuable, limited edition and one-of-a-kind artwork. Also use UV protection glass or acrylic on all works of art your customers want to protect, especially posters and open edition prints. Posters or open edition prints are more susceptible to UV light damage since the inks, papers and other materials used to create them are more likely to deteriorate than those used in higher end reproductions.
Without at least 97% UV protection, framed pieces will age and fade more rapidly. Indoor and outdoor UV light rays contribute to severe color loss, paper embrittlement and deterioration of framed pieces. These effects are both cumulative and irreversible. The materials that make up the piece, the paper or fabric on which the image is displayed, may become brittle. Photos may appear yellow or stained with ghostly silver deposits rising to the surface. Once damage from light has occurred, it can never be reversed. That’s why it is important to understand what you can do to minimize this type of damage before it happens.
Yes. While it is very important to reduce UV light exposure, this alone will not eliminate fading and other deterioration. All light, not just UV light can be damaging. Heat, pollution, moisture, the materials that make up the piece as well as poor quality framing materials are all contributing factors. Using conservation framing techniques and materials as well as educating your customer on how to properly display and care for their framed piece will help minimize the risk of damage caused by these factors.
Remind your customers that care should be given when displaying their framed piece to avoid unnecessary exposure to light. Since some light is required for your customers to enjoy and see their framed pieces, it is all the more important to reduce any damage from UV light, by using glazing with at least 97% UV protection.
Help your customers select framing materials that will protect their framed pieces for years to come. Educate your customers on the damaging effects of all light, visible and invisible, and recommend that they select glazing with at least 97% UV protection to reduce the damaging effects of UV light. Give your customers simple instructions for displaying and caring for their framed piece. UV protection will not eliminate fading, so your customers should use care when displaying their framed pieces. Direct light exposure for any duration should be avoided. Hanging or displaying the piece in a controlled lighting environment with low humidity is recommended.
For additional tips, Tru Vue recommends reading guide entitled: A Consumer Guide to Materials for Preservation Framing and the Display of Photographic Images, written by the Image Permanence Institute. To download this guide, go to www.imagepermanenceinstitute.org.
Yes. All light can be harmful. While fluorescent lighting can have a higher output in the UV range compared to incandescent lighting, the more important factor is the overall brightness of the light source. To minimize light damage, avoid placing artwork near sunlit windows or bright sources of light
Yes. Unfortunately, the sun is not the only source of harmful UV light rays. All light sources, whether natural or artificial, have some of their components in the ultraviolet range.
Reducing Reflections
The thin film coatings on Tru Vue anti-reflective glass and acrylic disrupt the energy contained in light waves causing them to flow out of sync. This disrupted wave pattern virtually eliminates all reflection from the acrylic surface. Diagrams of how this process works are included with the descriptions of all anti-reflective products.
Non-glare picture framing glass is finished to diffuse reflected light. Non-glare acrylic is embossed to diffuse reflected light. Both processes also give the glass and acrylic surfaces a matte finish.
Anti-Static
Tru Vue Optium Museum Acrylic and Optium Acrylic are anti-static. For all other acrylic products, spray with a de-ionizing air gun, then wipe with a clean, damp, high performance cleaning cloth. This will reduce static temporarily
Pastel or charcoal based art can become damaged using most glazing products due to the inherent static charge of the substrate. Tru Vue Optium® Acrylic Glazing provides long-lasting anti-static as well as anti-reflective properties to help protect art from damage and to help showcase your art the way it was intended.
Applications
Tru Vue recommends using acrylic for hanging and shipping heavy oversized artwork, in children’s rooms, in earthquake zones, in high traffic areas or anywhere where safety is a concern.
No framing grades of acrylic have out-gassing. However, to be certain, we recommend only buying acrylic made in North America. All Tru Vue acrylic products are out-gassing free.
You should use 3mm acrylic when the frame’s size exceeds 36”x48”. Tru Vue also offers 4.5mm and 6.0 Optium Museum Acrylic for oversized framing projects over 40”x60”. Following is a rough rule of thumb for choosing thickness of acrylic:
- For 40” x 40” or smaller – 3.0mm
- 40” x 40” to 60” x 60” – 4.5mm
- Above 60” x 60” – 6.0mm
For more tips on how to choose glazing, click here.
Either side of the conservation grade acrylic can face the artwork. Both sides carry the protective technology.
Our 6.0mm Optium Museum Acrylic is ideal for sizes greater than 40”x60” and is available in 72”x120” sheets. To prevent bowing, twisting, and/or warping of framed 40”x60” and larger acrylic sheets, provide reinforcing support of the acrylic sheet during framing.
The standard 1/16” is recommended for every 12″.
Typically, best practice is that a spacer or mat board be used when framing so that the artwork does not come in direct contact with the glazing (glass or acrylic). Placing any glazing in direct contact with the art could result in damage to the artwork due to moisture, heat transfer, and or vibration during transit. This damage may come in the form of color change, surface deterioration, warping, buckling, and or the artwork adhering to the underside of the glazing. For additional guidelines on conservation framing, please visit https://www.loc.gov/preservation/care/mat.html.
Pastel or charcoal based art can become damaged using most glazing products due to the inherent static charge of the substrate. Tru Vue Optium® Acrylic Glazing provides long-lasting anti-static as well as anti-reflective properties to help protect art from damage and to help showcase your art the way it was intended.
Transmitted color appears color neutral.
The anti-reflective coating is designed to perform in a museum gallery setting. On works hung vertically, it is optimized when viewed at a 90 degree angle. However, if the angle of view changes, so does the amount and color of reflection. Up to a viewing angle of about 35 degrees the non-reflective, color neutral properties remain. Beyond that, reflections may become visible in a subtle greenish/blue color and certain lighting conditions may make this more noticeable. The amount of reflection, however, is significantly lower than the reflection of regular uncoated glass or acrylic.
No acrylic will self-extinguish. Optium Acrylic Products are combustible and usually burn to completion if not extinguished. Precautions should be taken to protect this material from flames and high heat sources.
Yes, Optium Museum Acrylic can be used to fabricate display and wall cases. It is important to note that coating removal and proper cementing are important steps in fabricating museum quality display cases using Optium Acrylic Glazing. All Optium products have a hard-coat and an anti-reflective film on both surfaces (approximately 0.005 in) that must be removed from the joint area prior to cementing. Click here to download our case fabrication guidelines.
Currently, the largest sheet size of Optium Museum Acrylic we manufacture is 6.0mm, 72″ x 120″ (3048 x 1829mm). There are several suppliers that can join large sheets of 6.0mm Optium Museum Acrylic end to end to create sheets larger than 72″ x 120″ (3048 x 1829mm). Please contact us for more information at fineart@truvue2023prd.wpengine.com.
To learn more about Tru Vue Optium Acrylic Products, contact your authorized Optium supplier
No. TruLife Acrylic is NOT anti-reflective in framing applications and will behave like an uncoated, UV filtering acrylic if used for framing. TruLife Acrylic is a single-sided, anti-reflective acrylic, specifically designed for face mount and direct print applications. Anti-reflective viewing only occurs when the artwork is face/second surface mounted or directly printed on the uncoated side; even the slight space of air between the artwork and the substrate when flush is significant enough to negate the anti-reflective performance.
TruLife is covered with a protective film masking on both sides, plus a product identification tape. The product identification tape will be labeled with “PRINT/MOUNT TO OPPOSITE SIDE” to identify the printable/mountable side. Do not remove the protective film or product identification tape before determining which side to print/mount. Do not print/mount to the anti-reflective side (the side with the blue protective film and product identification tape).
Cleaning, Cutting & Handling
Care should be given when handling acrylic. To minimize finger prints and other particles, Tru Vue recommends wearing cotton or nitrile rubber gloves when handling acrylic. Tru Vue acrylic products are covered with a protective film masking on each surface. This masking prevents scratching during handling and cutting and should be left in place on the sheet as long as possible. To remove the masking start at one corner and pull towards the opposite side of the sheet slowly and evenly without stopping. The masking should never be exposed to excessive sunlight or outdoor conditions for extended periods of time.
Cleaning techniques vary by acrylic product.
For Optium® Acrylic Glazing products use the following cleaning techniques. Place the acrylic on a clean, non-abrasive surface for cleaning. Spray a small amount of ammonia-free glass cleaner onto a clean micro-fiber cloth or a soft, lint-free cloth. To prevent overspray, do not spray cleaner directly on the acrylic. Do not use an acrylic cleaner on this product. Do not use coarse or abrasive cleaning agents or dirty cloths. Do not buff scratches in this product as it may damage the anti-reflective coating.
For Conservation Clear® Acrylic and Premium Clear Acrylic use the following cleaning techniques. Place the acrylic on a clean, non-abrasive surface for cleaning. Use an acrylic cleaner and a clean damp cleaning cloth. Apply only light pressure, rinse with clean water or a cleaner designed specifically for acrylic, and dry by blotting with a clean, damp cloth or chamois. Do not use dry or gritty cloths, as they may cause surface scratches and create a static electric charge on the surface. Do not use glass cleaning sprays, kitchen scouring compounds or solvents such as acetone, gasoline or lacquer to clean acrylic.
For Conservation Reflection Control® Acrylic and Reflection Control® Acrylic use the following cleaning techniques.
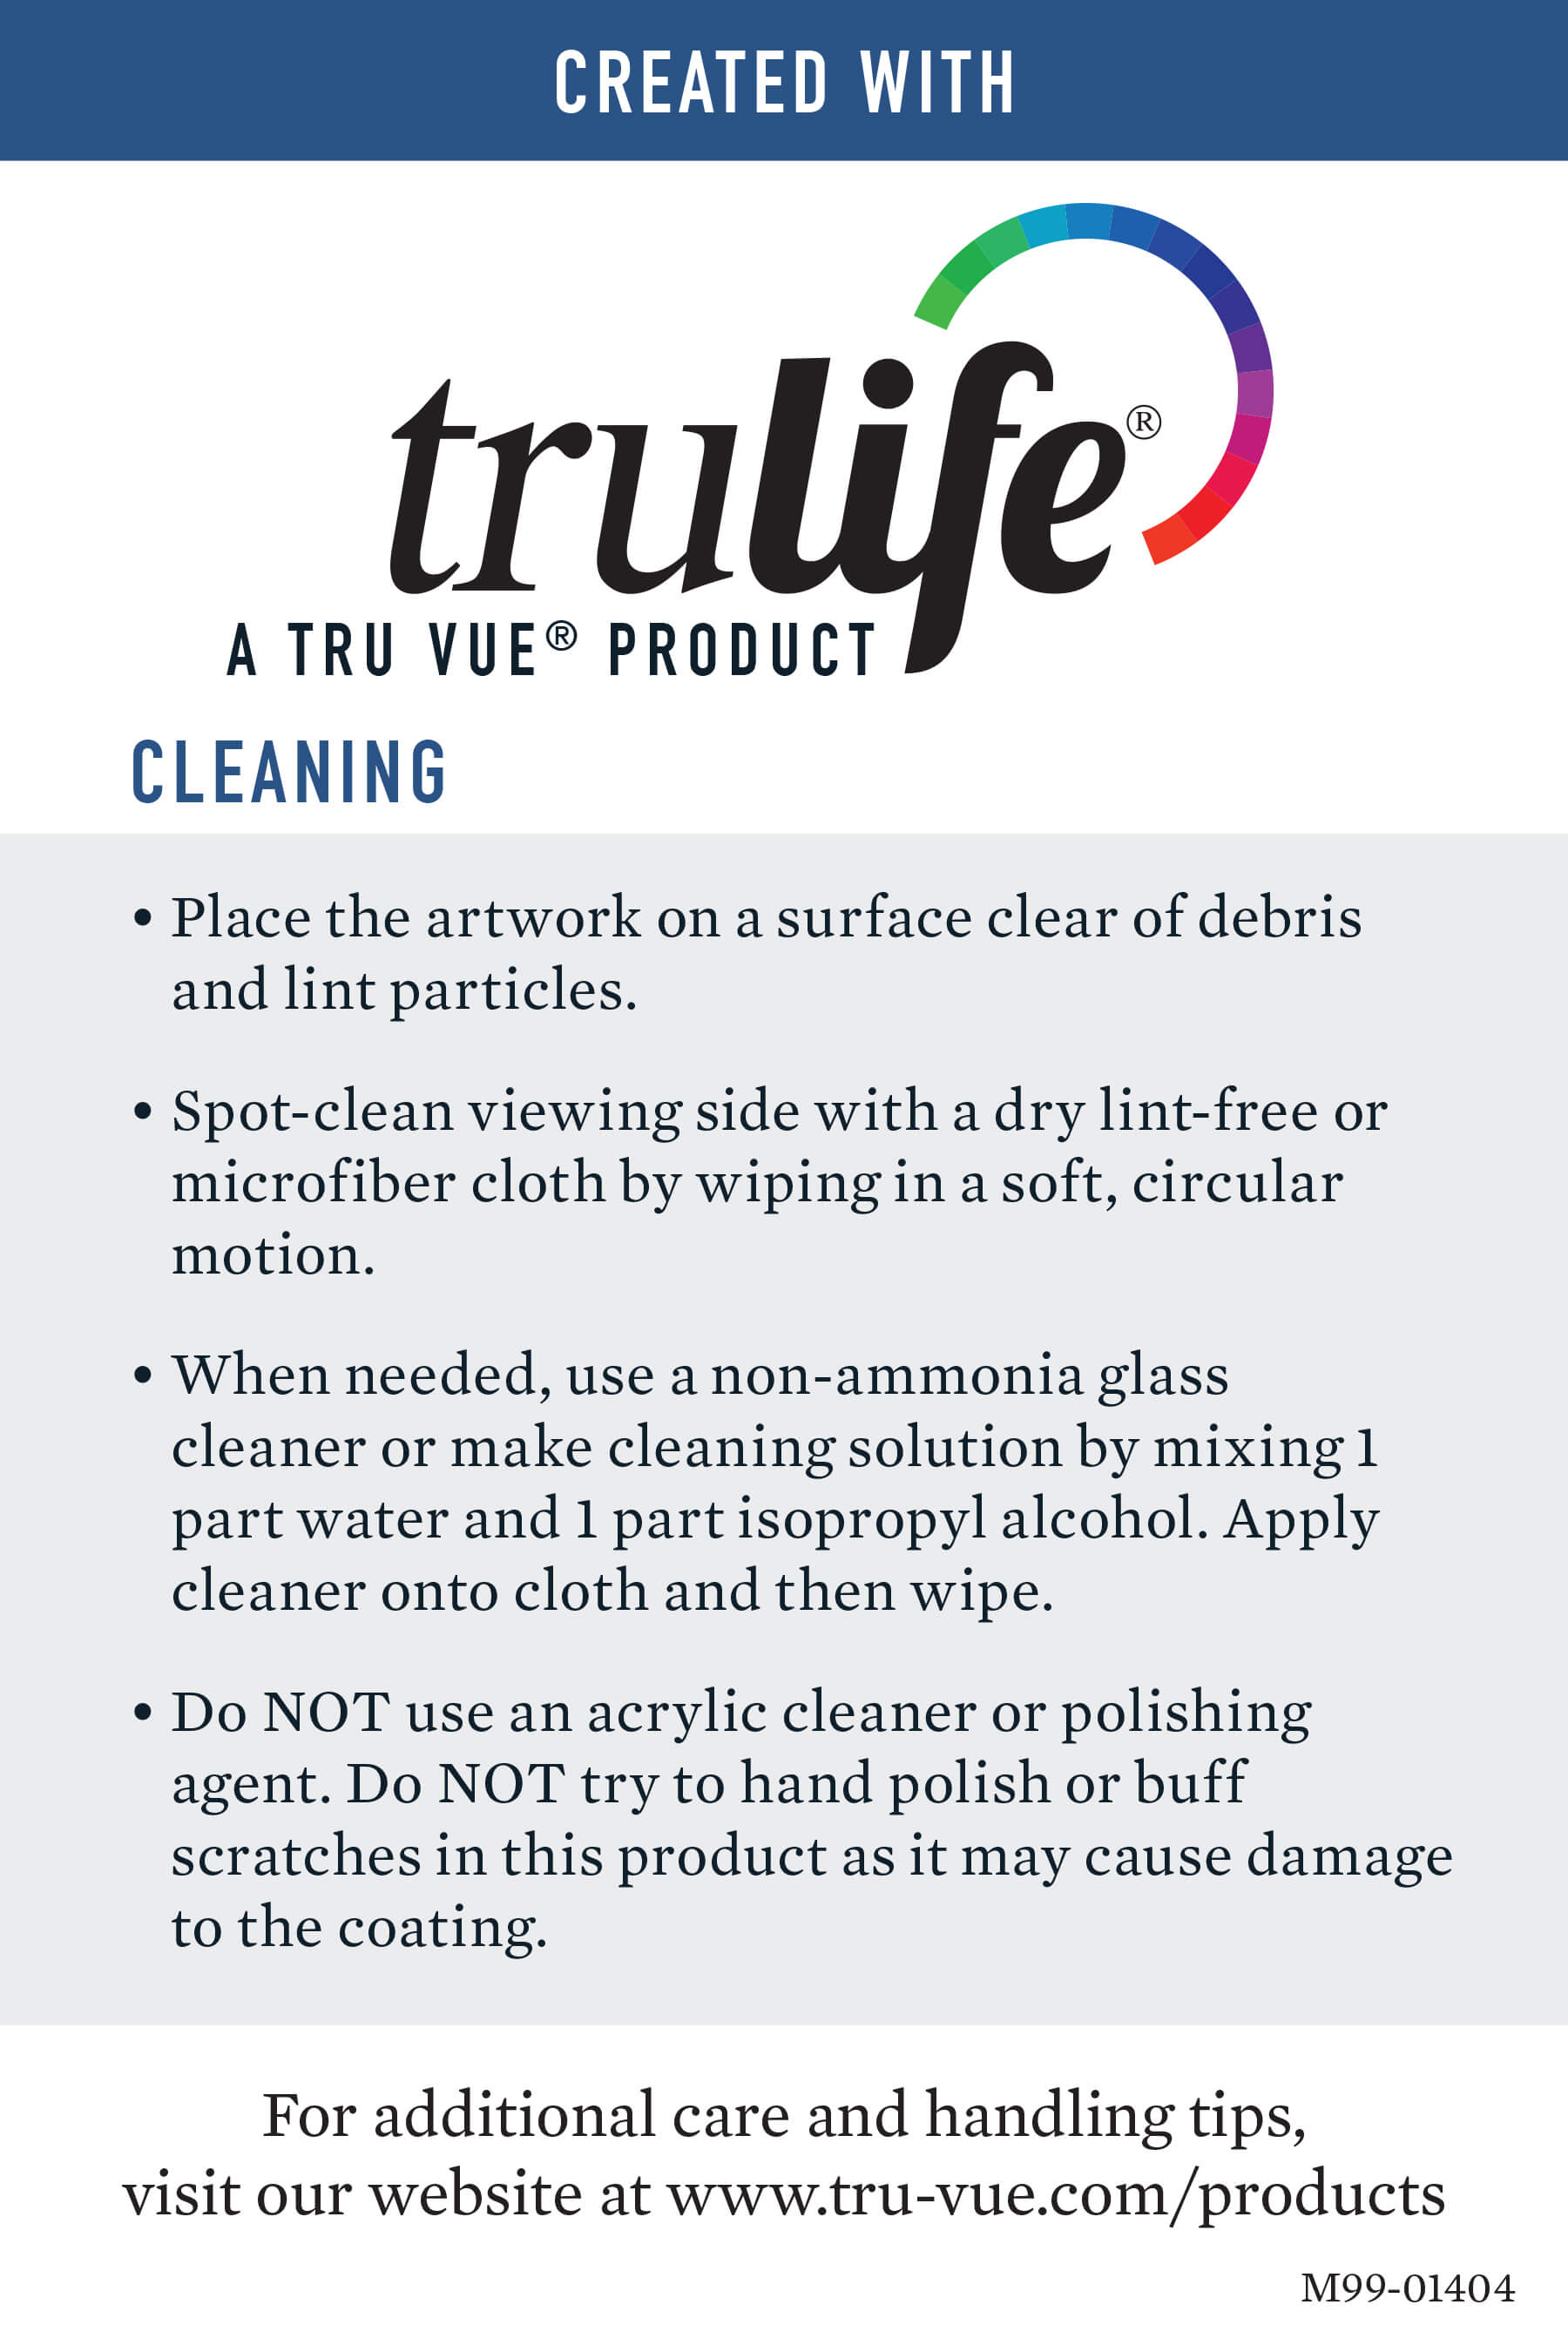
Dry method cleaning: Spot-clean any finger prints with the dry micro-fiber cloth by wiping in a soft, circular motion.
Alternative method of cleaning: Mild soap and water solution may be used if dry cleaning is not effective. DO NOT use acrylic cleaners or polishing agents. DO NOT use window cleaning sprays, kitchen scouring compounds, or solvents such as acetone, gasoline, or lacquer thinner to clean acrylic materials.
For Optium® & StaticShield™ Acrylic
Do not hand polish or buff scratches in this product as it may cause damage to the coating. Abrasion-resistant properties prevent mild scratching, but not deep scratches. Cuts by hard objects cannot be repaired.
For Conservation Clear® Acrylic and Premium Clear Acrylic
Fine scratches can be removed by hand polishing with a recommended acrylic polish or paste wax. Apply polish to a soft cloth and rub. When the scratches have disappeared, remove all residue and polish.
For Conservation Reflection Control® Acrylic and Reflection Control® Acrylic
Do not hand polish or buff scratches in this product as it may cause damage to the sheet.
Cleaning with harsh chemicals such as ammonia can be harmful to your customers valued pieces. Ammonia can cause out-gassing within the framing package.
2.3mm, 3.0mm, and 4.5mm acrylic products can be cut with the same methods used to cut other acrylic or “plexi”, using a multi-material cutter “scribe and break” method. Cover the worktable with a soft, clean, lint-free felt. Leave the protective film masking on the sheet when cutting. Score the sheet with a sharp scoring knife designed for plastic multiple times and then snap the sheet to break. A multi-material cutter can be used with an acrylic blade attachment.
Panel saws can be used and come with either horizontal or vertical tables. The vertical saws take up less floor space and permit easy placement of large acrylic sheets.
For 4.5mm and 6.0mm acrylic sheets, the choice of saw blade is important. A carbide-top blade with a triple-chip tooth design, also known as TCG (Triple Chip Grind), designed for plastics is recommended. For best results, the teeth should be shaped with a proper rake angle and have sharp cutting edges with adequate clearance.
Optium Museum Acrylic should NOT be cut with a laser. The extreme heat can cause crazing, which may lead to delamination of the coating.
Care should be given when handling glass. To avoid injury, Tru Vue recommends wearing cotton gloves when handling glass. Avoid dragging the lites of glass against on another when removing from the box. Do not slide the lite of glass into place. Lift it up to adjust and reposition.
All of Tru Vue glass products are clean and ready to use out of the box. If spot cleaning is needed, spray a small amount of ammonia-free glass cleaner on a micro-fiber cloth or a clean lint-free cotton rag. To prevent overspray, do not spray the cleaner directly on the glass. Press the cloth against the glass and clean in a round, circular motions.
The inkjet printing is printed at the very edge of the lite of glass and is small enough to be hidden by the rabbet of the frame. If you choose to remove the inkjet printing, apply a small amount of acetone (fingernail polish remover) to a cotton swap to wipe the lite clean.
Any glass cutter that is used for cutting regular glass may be used.
Place a slip sheet or a non-slip matboard between the glass and the back of the wall cutter. For Tru Vue Conservation Grade glass products, including Museum Glass®, Conservation Clear® and Conservation Reflection Control, place the lite of glass in the wall unit, with the UV coated side towards the wall, facing the slip sheet or matboard. Do not score the UV coated side. Premium Clear can be scored on either side, so placement in the cutter doesn’t matter. Be sure to keep the glass cutter clean of glass chips by brushing away fragments frequently with a horse hair brush.
The inkjet printing or static cling sticker will indicate which side to score. The side to be scored is the non UV coated side, so the UV coating is on the opposite side. For Museum Glass and Conservation Clear the UV coated side is always the side with the inkjet printing or static cling sticker. For Conservation Reflection Control the UV coating is on the opposite side of the inkjet printing.
The UV coated side will also bead water or glass cleaner more than the non UV side. Using a razor blade you can apply a small light scratch on the edge of the glass which will be hidden by the rabbet of the frame. The UV coating will be scratched, the glass will not. Wear gloves while doing this to prevent cuts.
It is recommended that the UV coated side of the glass face the artwork. This side can be identified by the inkjet printing, which appears along the edge of the lite. However, the UV blocking capabilities are in no way diminished by the placement of the lite. When using Conservation Reflection Control the matte finished side should face out and the non-finished side should face the artwork.


